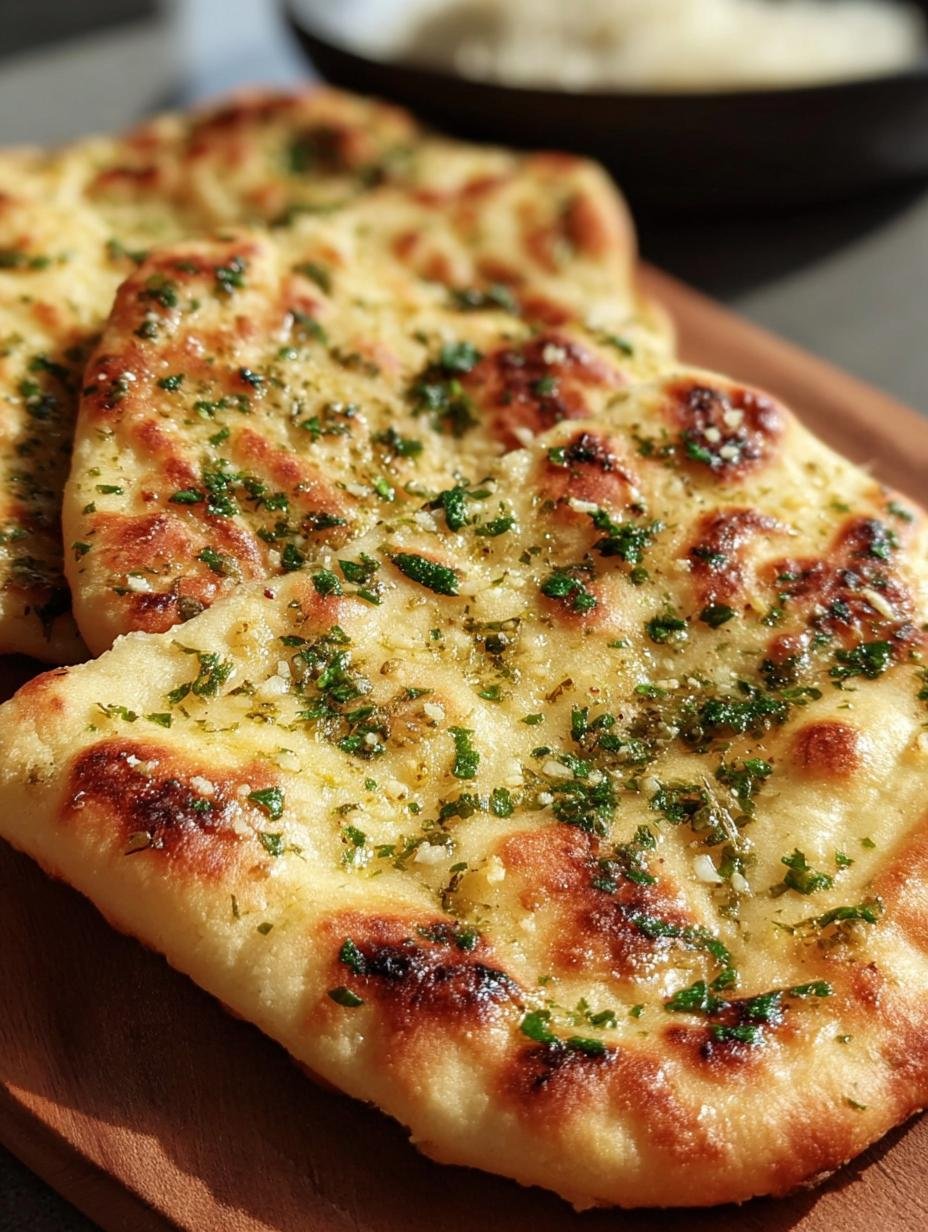
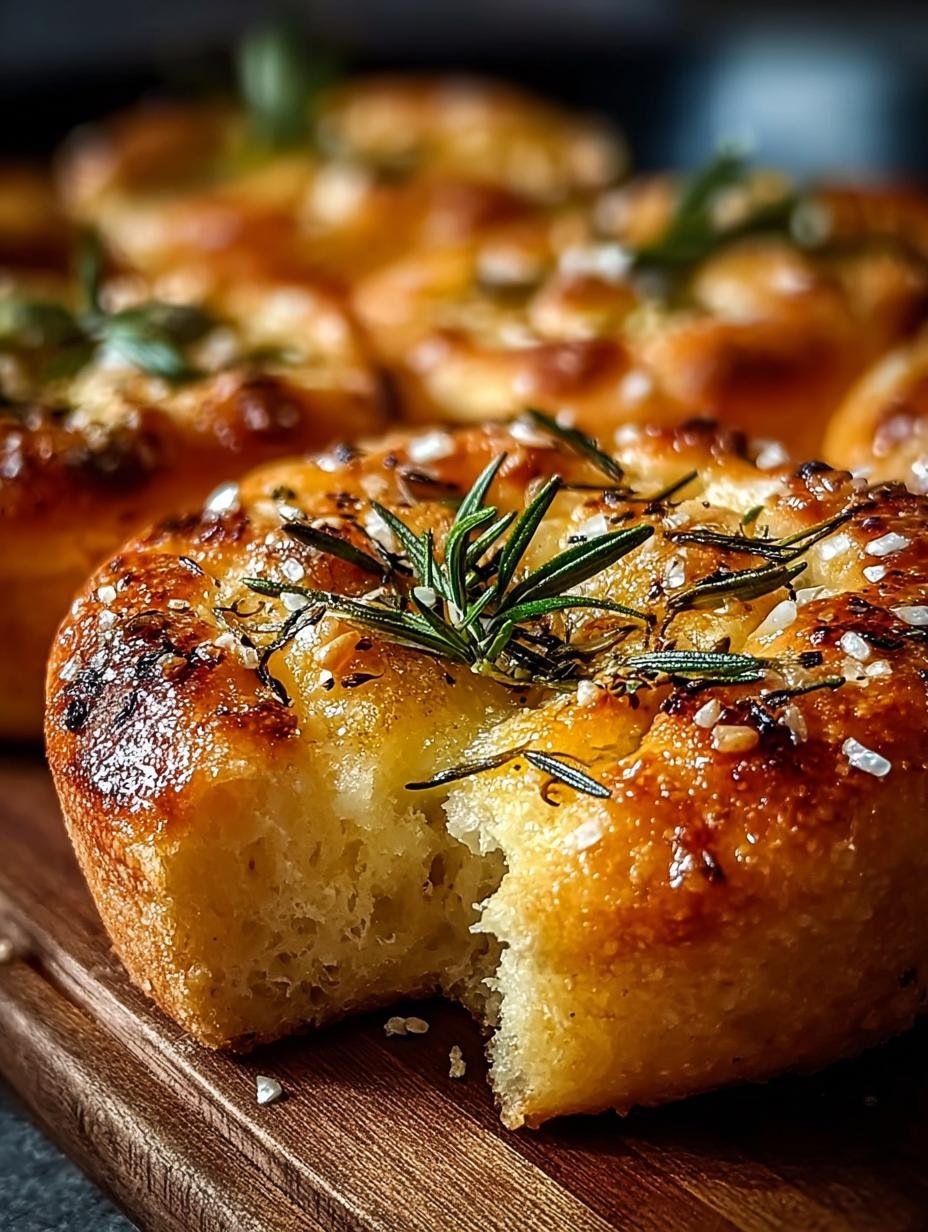
Garlic Butter Flatbread has quickly become one of my favorite kitchen discoveries. I still remember the first time I whipped up a batch – the aroma of melting butter and garlic filled my entire home, instantly making my mouth water. This incredibly easy garlic flatbread recipe is a game-changer for busy weeknights, offering a warm, pillowy side that pairs with just about anything. I love how simple it is to make this homemade garlic flatbread from scratch, and the taste is far superior to anything store-bought. You’ll adore the soft texture and rich flavor of this quick and easy garlic flatbread. Let’s get cooking!
Why You’ll Love This Garlic Butter Flatbread
I know you’ll fall in love with this Garlic Butter Flatbread for so many reasons. It’s a truly delightful addition to any meal, and I promise you won’t regret making it. Here’s why this recipe stands out:
- It offers an incredible burst of savory garlic and rich butter flavor that’s simply irresistible.
- This is a quick garlic flatbread, meaning you can have it on the table in under 35 minutes, perfect for busy evenings.
- Making this homemade garlic flatbread is surprisingly simple, requiring minimal effort and no yeast.
- It’s incredibly versatile, pairing wonderfully with soups, stews, curries, or even as a standalone snack.
- You’ll find this recipe to be very budget-friendly, using common ingredients you likely already have.
- The whole family will adore the soft, chewy texture and comforting taste of this delicious flatbread.
Ingredients for Garlic Butter Flatbread
Gathering your ingredients is the first step to creating this amazing Garlic Butter Flatbread. I’ve found that using good quality ingredients really makes a difference in the final flavor and texture. This simple list will help you craft the perfect Garlic Butter Dough Recipe that’s both easy and delicious.
- 2 cups All-purpose flour – The foundation of our soft and chewy flatbread.
- 2 teaspoons Baking powder – This is our leavening agent, giving the flatbread its wonderful puff without yeast.
- ½ teaspoon Salt – Essential for enhancing all the flavors in the dough.
- 1 cup Plain Greek yogurt or plain regular yogurt – My secret ingredient for an incredibly tender and moist dough.
- ¼ cup Unsalted butter, melted – Provides that rich, golden base for our garlic butter.
- 3-4 cloves Garlic, minced – The star of the show! Minced fresh garlic delivers the best aroma and taste.
- 2 tablespoons Fresh parsley or dried parsley, chopped – For a pop of color and fresh herb flavor as a garnish.
How to Make Garlic Butter Flatbread
Making this delicious Garlic Butter Flatbread is a straightforward process, and I promise you’ll love how quickly it comes together. I’ve broken down every step to ensure your flatbreads turn out perfectly soft, flavorful, and golden brown. This is truly the best way to learn how to make Garlic Butter Flatbread from scratch.
- Step 1: In a large mixing bowl, combine the all-purpose flour, baking powder, and salt. Whisk these dry ingredients together thoroughly until they are evenly distributed. This ensures that the leavening agent works its magic consistently throughout the dough.
- Step 2: Add the plain Greek yogurt to your dry mixture. Stir it with a spoon or your hands until a soft, shaggy dough begins to form. Don’t worry if it looks a little rough at first; it will come together beautifully.
- Step 3: Transfer the dough onto a lightly floured surface. Knead the dough gently for about 5 minutes. You’ll notice it becoming much smoother and more elastic under your hands, a sign of a perfectly developed dough for your Garlic Butter Flatbread.
- Step 4: Form the kneaded dough into a ball and let it rest for 10 to 15 minutes. This resting period is crucial as it allows the gluten to relax, making the dough easier to roll out later.
- Step 5: While your dough is resting, it’s time to prepare that irresistible garlic butter. In a small saucepan, melt the unsalted butter over low heat. Add the minced garlic and cook gently for about 1-2 minutes until it becomes fragrant. Be careful not to brown the garlic, as it can turn bitter. Remove the pan from the heat and set it aside.
- Step 6: Divide your rested dough into 6 to 8 equal portions. On your lightly floured surface, roll each portion into an oval or round shape, aiming for about ¼ inch thickness. I find that thinner flatbreads cook more evenly and get that lovely char.
- Step 7: Heat a nonstick skillet or cast iron pan over medium heat until it’s nice and hot. You want a good sizzle when the dough hits the pan.
- Step 8: Place one rolled flatbread onto the dry hot skillet. Cook for 1 to 2 minutes per side, or until beautiful golden brown spots appear and the flatbread puffs up, indicating it’s cooked through. The aroma of the cooking dough is just wonderful!
- Step 9: Remove the cooked flatbread from the skillet and immediately brush it generously with your prepared garlic butter mixture. The warm bread will soak up all that garlicky goodness.
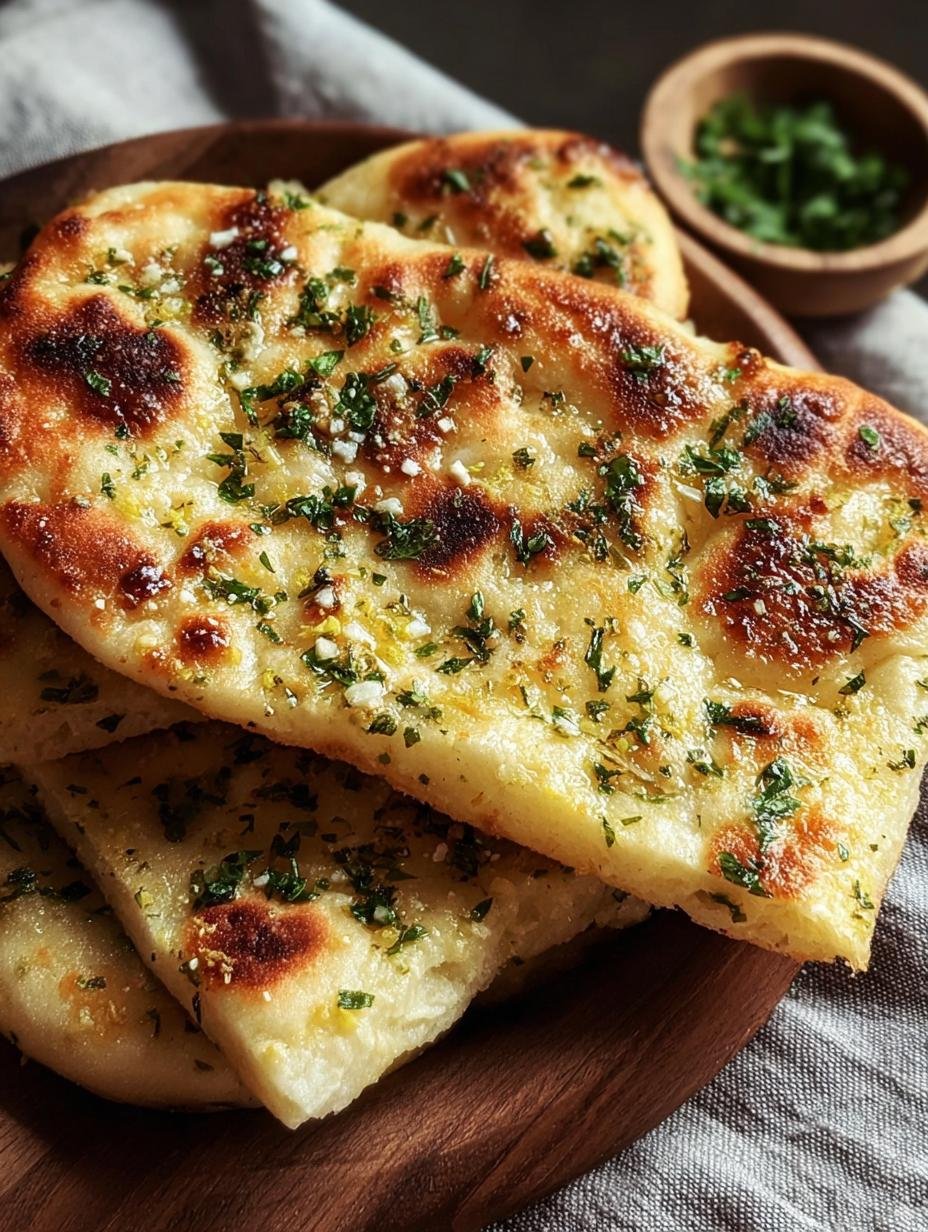
- Step 10: Sprinkle with fresh or dried parsley for a pop of color and extra flavor.
- Step 11: Repeat this process with the remaining dough portions, stacking the cooked flatbreads and covering them with a clean kitchen towel to keep them warm until you’re ready to serve. Now you know how to make Garlic Butter Flatbread that everyone will rave about!

Pro Tips for the Best Garlic Butter Flatbread
I’ve made countless batches of this flatbread, and I’ve picked up a few tricks to ensure each one is absolutely perfect. These pro tips will elevate your Garlic Butter Flatbread from good to truly exceptional, making your homemade version the star of any meal.
- Always use full-fat Greek yogurt for the dough; it provides the best texture and moisture.
- Don’t over-knead the dough. Just 5 minutes is enough to make it smooth and elastic without developing too much gluten.
- Cook the flatbreads one at a time in a hot skillet to achieve that beautiful golden-brown char and puffed-up texture.
- Brush the garlic butter on immediately after cooking while the flatbread is still hot to allow it to soak up all the flavor.
What’s the secret to perfect Homemade Garlic Flatbread?
The real secret to the best Garlic Flatbread recipe lies in the yogurt dough. The acidity and fat in the yogurt react with the baking powder, creating an incredibly tender, chewy crumb. This combination ensures a moist and flavorful flatbread every time.
Can I make Garlic Butter Flatbread ahead of time?
Absolutely! You can prepare the dough up to 24 hours in advance. Simply form it into a ball, cover it tightly with plastic wrap, and refrigerate. Let it come to room temperature for about 30 minutes before rolling and cooking.
How do I avoid common mistakes with Garlic Herb Flatbread?
To avoid dry or tough Garlic Herb Flatbread, don’t overcook it in the skillet; 1-2 minutes per side is usually plenty. Also, ensure your skillet is hot enough before adding the dough to get that nice puff and color, preventing a pale, undercooked result.
Best Ways to Serve Garlic Butter Flatbread
I find that this versatile Garlic Butter Flatbread is delicious on its own, but it truly shines when paired with other dishes. It’s so easy to incorporate into almost any meal, transforming a simple dinner into something special. Here are my favorite ways to enjoy this flavorful flatbread:
- This flatbread makes an excellent accompaniment to hearty soups and stews. I love dipping it into a rich tomato soup or a spicy lentil stew; the flavors complement each other beautifully.
- It’s perfect as a side for grilled meats or roasted vegetables. The garlicky goodness adds a wonderful savory element that enhances the main course.
- For a fantastic appetizer, serve this Garlic Flatbread for Dipping alongside hummus, baba ghanoush, or a creamy spinach artichoke dip. It’s always a crowd-pleaser and disappears quickly at gatherings.
Nutrition Facts for Garlic Butter Flatbread
I know many of you keep an eye on nutritional values, so I’ve put together an estimate for this delicious Garlic Butter Flatbread. These figures are based on the ingredients listed and assume the recipe yields 8 servings, making it easy for you to incorporate this treat into your meal planning.
- Serving Size: 1 flatbread
- Calories: 250
- Protein: 7g
- Fat: 10g
- Saturated Fat: 6g
- Unsaturated Fat: 3g
- Trans Fat: 0g
- Carbohydrates: 30g
- Fiber: 1g
- Sugar: 2g
- Sodium: 200mg
- Cholesterol: 20mg
Please remember that these nutritional values are estimates and may vary slightly based on the specific brands and types of ingredients you use.
How to Store and Reheat Garlic Butter Flatbread
I always make extra Garlic Butter Flatbread because it’s so delicious, and thankfully, it stores and reheats beautifully! Proper storage ensures you can enjoy that wonderful garlicky flavor for days to come. It’s perfect for meal prep or simply having a quick snack ready.
Once your flatbread with garlic and butter has completely cooled to room temperature, store any leftovers in an airtight container or a resealable plastic bag. It will keep well on your kitchen counter for up to 2 days, or in the refrigerator for up to 4 days. For longer storage, you can freeze individual flatbreads for up to 3 months.
When you’re ready to enjoy them again, I recommend reheating your Garlic Butter Flatbread in a dry skillet over medium-low heat for a few minutes until warmed through and slightly crispy. Alternatively, you can wrap them in foil and warm them in a 300°F oven for about 10 minutes. This method helps maintain their soft texture.
Frequently Asked Questions About Garlic Butter Flatbread
What is Garlic Butter Flatbread?
Garlic Butter Flatbread is a delicious, unleavened bread infused with the rich flavors of garlic and butter. Unlike traditional bread, it typically doesn’t use yeast, making it much quicker to prepare. It’s soft, chewy, and perfect as a side dish or appetizer.
Can I use different herbs in my Garlic Butter Flatbread?
Absolutely! While parsley is a classic choice for Garlic Butter Flatbread, feel free to experiment. I love adding fresh dill, chives, or even a sprinkle of dried oregano to the garlic butter mixture for a different flavor profile. Just remember to chop fresh herbs finely.
What can I substitute for Greek yogurt in this recipe?
If you don’t have Greek yogurt, I’ve found that regular plain yogurt works just as well for this Garlic Butter Flatbread. You can also use sour cream, though it might make the dough slightly richer. The key is to use a dairy product with some acidity to react with the baking powder.
How do I get my Garlic Butter Flatbread to puff up nicely?
The secret to a beautifully puffed Garlic Butter Flatbread lies in two things: a well-kneaded dough and a hot skillet. Make sure you knead the dough for the recommended 5 minutes to develop some elasticity. Then, cook it on a medium-high heat in a dry, hot pan. This creates steam inside the dough, causing it to puff up as it cooks.
Variations of Garlic Butter Flatbread You Can Try
One of the things I truly adore about this Garlic Butter Flatbread recipe is how incredibly adaptable it is! Once you have the basic dough down, the possibilities for customization are endless. I love experimenting with different flavors, and I encourage you to do the same to suit your taste or what you have on hand.
- For a delightful twist, try making a Cheesy Garlic Flatbread. Simply sprinkle some shredded mozzarella or Parmesan cheese over the flatbread immediately after brushing with garlic butter, then pop it back into the warm skillet for another minute or so until the cheese is bubbly and melted.
- If you’re looking for a richer flavor, swap out some of the butter for olive oil in your garlic mixture. You can also add a pinch of red pepper flakes for a subtle kick.
- Experiment with herbs! Besides parsley, I’ve found that fresh rosemary or thyme finely chopped and mixed into the garlic butter adds a wonderful aromatic depth to your Garlic Butter Flatbread.
- For a gluten-free option, you can experiment with a 1:1 gluten-free flour blend, though the texture might vary slightly. This allows everyone to enjoy a delicious Garlic Butter Flatbread.

Irresistible Garlic Butter Flatbread: 35-Min Heaven
- Total Time: 35 minutes
- Yield: 6–8 flatbreads 1x
- Diet: Vegetarian
Description
This Easy Garlic and Butter Flatbread is a soft, chewy, and flavorful side dish or snack. It’s made without yeast, so it’s quick to prepare and perfect for pairing with dips, soups, or saucy dishes. Each piece is brushed with a rich garlic butter mixture and pan-cooked until golden, offering a warm and comforting bite.
Ingredients
- 2 cups All-purpose flour
- 2 teaspoons Baking powder
- ½ teaspoon Salt
- 1 cup Plain Greek yogurt or plain regular yogurt
- ¼ cup Unsalted butter, melted
- 3–4 cloves Garlic, minced
- 2 tablespoons Fresh parsley or dried parsley, chopped, for garnish
Instructions
- In a mixing bowl, whisk together the flour, baking powder, and salt until evenly combined.
- Add the yogurt to the dry ingredients and stir until a soft dough forms.
- Transfer the dough to a lightly floured surface and knead for about 5 minutes until it becomes smooth and elastic.
- Form the dough into a ball and let it rest for 10 to 15 minutes.
- While the dough rests, prepare the garlic butter: In a small saucepan, melt the butter over low heat. Add the minced garlic and cook gently until fragrant, being careful not to brown the garlic. Remove from heat and set aside.
- Divide the rested dough into 6 to 8 equal portions. Roll each portion into an oval or round shape, about ¼ inch thick.
- Heat a nonstick skillet or cast iron pan over medium heat until hot.
- Place one rolled flatbread onto the dry skillet. Cook for 1 to 2 minutes per side, or until golden brown spots appear and the flatbread puffs up.
- Remove the cooked flatbread from the skillet and immediately brush generously with the prepared garlic butter.
- Sprinkle with fresh or dried parsley.
- Repeat with the remaining dough portions, stacking the cooked flatbreads and covering them with a towel to keep warm until ready to serve.
Notes
- For a crispier texture, cook the flatbreads slightly longer or brush them with garlic butter before cooking.
- Add herbs like oregano or thyme to the dough for extra flavor.
- These garlic butter flatbreads are best served fresh.
- Store leftover flatbreads in an airtight container at room temperature for up to 2 days, or in the fridge for up to 4 days.
- Reheat flatbreads in a dry skillet over medium-low heat or wrapped in foil in a 300°F oven for about 10 minutes.
- These flatbreads pair well with hummus, curry, grilled meats, or can be used as a quick base for personal pizzas.
- Prep Time: 20 minutes
- Cook Time: 15 minutes
- Category: Brunch, Side Dish, Appetizer
- Method: Pan-fried
- Cuisine: Mediterranean
Nutrition
- Serving Size: 1 flatbread
- Calories: 250
- Sugar: 2g
- Sodium: 200mg
- Fat: 10g
- Saturated Fat: 6g
- Unsaturated Fat: 3g
- Trans Fat: 0g
- Carbohydrates: 30g
- Fiber: 1g
- Protein: 7g
- Cholesterol: 20mg


Leave a Reply