
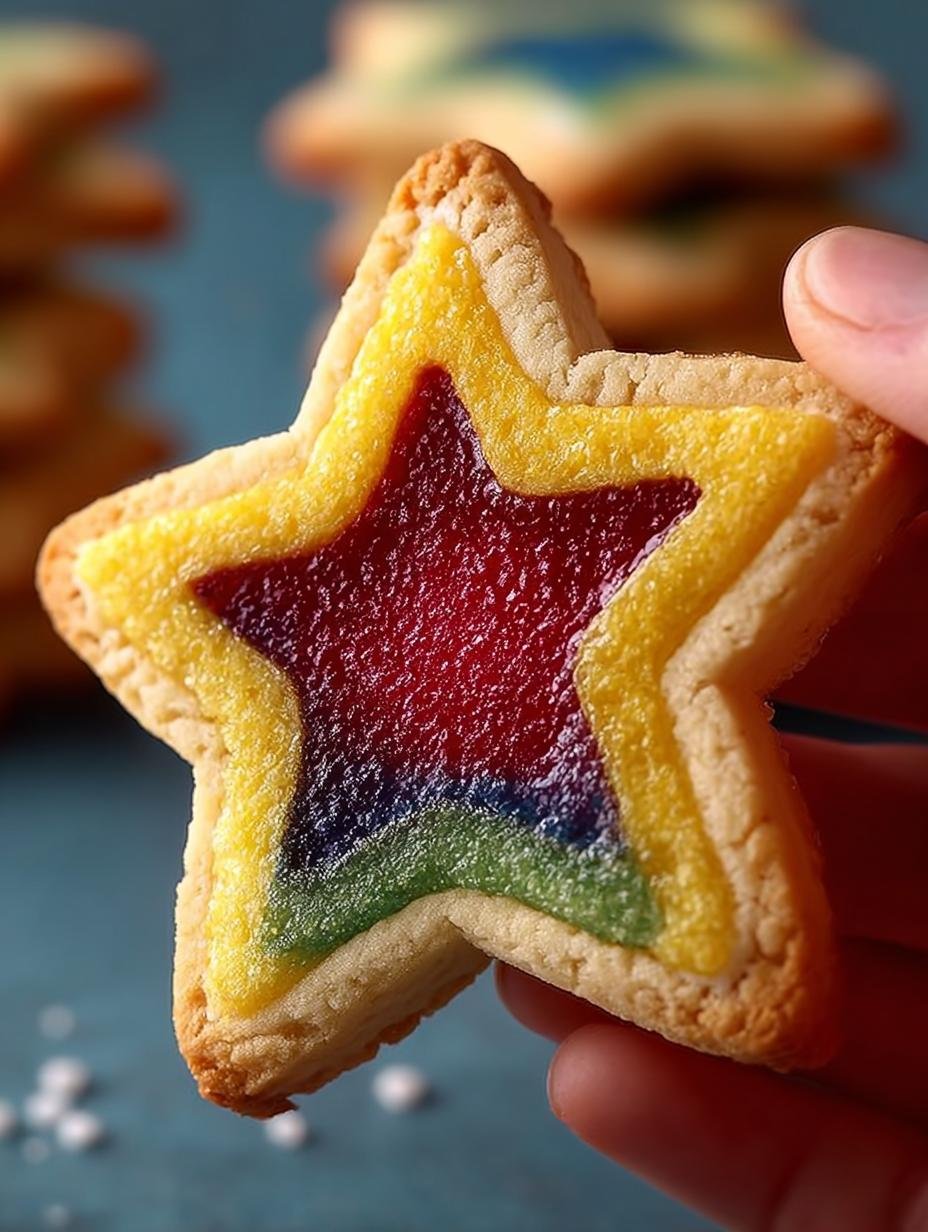
Stained Glass Cookies are a delightful and visually stunning treat that brings joy to any occasion. These cookies, filled with colorful melted candies, resemble beautiful stained glass windows. They are perfect for holiday celebrations or as a fun baking project with kids. The contrast of vibrant colors against the classic sugar cookie base creates an irresistible dessert that’s not only tasty but also a feast for the eyes. Let’s dive into how to make these beautiful treats!
Why You’ll Love This Stained Glass Cookies
There are countless reasons to adore Stained Glass Cookies. First, they are incredibly easy to make, allowing you to whip them up for any occasion. Second, these cookies are visually appealing, making them a great conversation starter at parties. Third, the colorful window cookies can be customized with your favorite hard candies, giving each batch a unique flair. Fourth, they can be made ahead of time, perfect for busy holiday schedules. Fifth, they are a delightful project for kids, making baking a fun family activity. Finally, these cookies are vegetarian-friendly, making them suitable for various dietary preferences. With these benefits, it’s easy to see why they are a favorite among bakers!
Ingredients for Stained Glass Cookies
Gather these items:
- 1 cup unsalted butter, softened
- 1 cup sugar
- 1 large egg
- 2 teaspoons vanilla extract
- 3 cups all-purpose flour
- 1 teaspoon baking powder
- 1/2 teaspoon salt
- Jolly Ranchers (hard candies), crushed
How to Make Stained Glass Cookies Step-by-Step
- Step 1: Cream together the butter and sugar using an electric mixer until light and fluffy.
- Step 2: Beat in the egg and vanilla extract.
- Step 3: In another bowl, whisk together the flour, baking powder, and salt.
- Step 4: Gradually blend the dry ingredients into the creamed mixture until just combined.
- Step 5: Wrap the dough in plastic wrap and refrigerate for at least 2 hours or until firm.
- Step 6: Preheat your oven to 350°F (175°C).
- Step 7: Roll out the dough on a floured surface to about 1/4 inch thick.
- Step 8: Use cookie cutters to cut out desired shapes, cutting smaller shapes from the center for windows.
- Step 9: Pour the crushed candies into the centers of each cookie.
- Step 10: Bake on a baking sheet lined with parchment for about 8-10 minutes or until edges are lightly golden.
- Step 11: Let them cool completely on a wire rack.

Pro Tips for the Best Stained Glass Cookies
Keep these in mind:
- Chill the dough adequately to make it easier to handle and cut.
- Use a variety of colors in your hard candies for the most vibrant decorative glass cookies.
- Make sure to crush the candies finely for an even melt.
- These cookies are best enjoyed fresh but can last in an airtight container for a week.
Best Ways to Serve Stained Glass Cookies
These delightful cookies can be served in various ways. They are perfect for holiday gatherings, especially as part of a festive cookie platter. You can also use them as holiday stained glass cookies to decorate your Christmas tree. Pair them with a warm beverage like hot cocoa or tea for a cozy treat.
How to Store and Reheat Stained Glass Cookies
To keep your Stained Glass Cookies fresh, store them in an airtight container at room temperature. They can last up to a week, making them an excellent option for meal prep during busy weeks. If you want to enjoy them warm, simply pop them in the microwave for a few seconds to soften them up.
Frequently Asked Questions About Stained Glass Cookies
What’s the secret to perfect Stained Glass Cookies?
To achieve perfect Stained Glass Cookies, ensure the dough is well-chilled and the candies are finely crushed. This will help them melt evenly, creating that stunning stained glass effect.
Can I make Stained Glass Cookies ahead of time?
Yes! You can prepare the dough in advance and refrigerate it for up to 3 days. This makes it easy to bake fresh cookies whenever you want.
How do I avoid common mistakes with Stained Glass Cookies?
A common mistake is not chilling the dough long enough, which can cause the cookies to spread. Additionally, ensure you do not overbake them to maintain their chewy texture.
Creative Variations of Stained Glass Cookies You Can Try
If you want to mix things up, consider these variations. Try using different flavored hard candies for unique taste combinations. You can also experiment with adding spices like cinnamon or nutmeg to the dough for a festive twist. For a gluten-free option, substitute the all-purpose flour with a gluten-free blend.

For more delicious recipes, check out our Cinnamon Orange Jam Linzer Cookies or try making Easy Cinnamon Rolls. If you’re looking for a savory option, our Veggie Burgers with Avocado Green Harissa are a great choice!
Print
Delicious Stained Glass Cookies for Every Occasion
- Total Time: 2 hours 5 minutes
- Yield: 24 cookies 1x
- Diet: Vegetarian
Description
Delicious sugar cookies filled with colorful melted hard candies that resemble stained glass.
Ingredients
- 1 cup unsalted butter, softened
- 1 cup sugar
- 1 large egg
- 2 teaspoons vanilla extract
- 3 cups all-purpose flour
- 1 teaspoon baking powder
- 1/2 teaspoon salt
- Jolly Ranchers (hard candies), crushed
Instructions
- Cream together the butter and sugar using an electric mixer until light and fluffy.
- Beat in the egg and vanilla extract.
- In another bowl, whisk together the flour, baking powder, and salt.
- Gradually blend the dry ingredients into the creamed mixture until just combined.
- Wrap the dough in plastic wrap and refrigerate for at least 2 hours or until firm.
- Preheat your oven to 350°F (175°C).
- Roll out the dough on a floured surface to about 1/4 inch thick.
- Use cookie cutters to cut out desired shapes, cutting smaller shapes from the center for windows.
- Pour the crushed candies into the centers of each cookie.
- Bake on a baking sheet lined with parchment for about 8-10 minutes or until edges are lightly golden.
- Let them cool completely on a wire rack.
Notes
- Prep Time: 2 hours
- Cook Time: 10 minutes
- Category: Dessert
- Method: Baking
- Cuisine: American
Nutrition
- Serving Size: 1 cookie
- Calories: 120
- Fat: 6g
- Carbohydrates: 15g
- Protein: 1g



Leave a Reply